Editing: Cut, Paste, and More
From Audacity Manual
A generation ago, the only way to edit audio was to physically cut the audio tape and carefully reattach it somewhere else, called splicing. Professional audio editors were very good at choosing a good location to splice, making a diagonal cut in a magnetic tape, and attaching it to another piece using splicing tape, but this process was understandably limited and not very forgiving if you made a mistake. Welcome to the digital world, where you can cut and paste as much as you want, quickly and easily.
The most important thing to remember is that Audacity has unlimited undo within a single editing session. Until you quit Audacity, you can make as many edits as you want, and then go back and undo all of them.
Simple editing is very much like editing text: select the word you want and choose Cut. Then click where you want that word to go and click Paste. Audacity has many more options, though, depending on the exact editing operation you want to do.
All of these editing commands can be found in the Edit menu. They all have keyboard shortcuts that you can find by looking in the Edit menu, and you can change them by opening the Preferences and clicking on the Keyboard tab.
Cut
Removes the selected audio, puts it on the clipboard, and shifts the following audio to the left (see before and after figures below).
Split Cut
Removes the selected audio and puts it on the clipboard but does not shift the following audio. The preceding and following audio are now separate clips that can be moved independently (see before and after figures below).
Copy
Copies the selected audio to the clipboard. The audio doesn't change.
Trim
Removes all audio from the current clip except the selected part. Does not affect other clips in the same track (see before and after figures below).
Delete
Removes the selected audio without placing it on the clipboard, and shifts following audio to the left (see before and after figures below).
Split Delete
Removes the selected audio without placing it on the clipboard, but does not shift the following audio. The preceding and following audio are now separate clips that can be moved independently (see before and after figures below).
Silence
Replaces the selection with silence (see before and after figures below).
Split
Splits the current clip into up to three clips at the selection boundaries. The audio before, within, and after the selection can now all be shifted independently (see before and both after figures below).
Clips can be moved around after splitting:
Duplicate
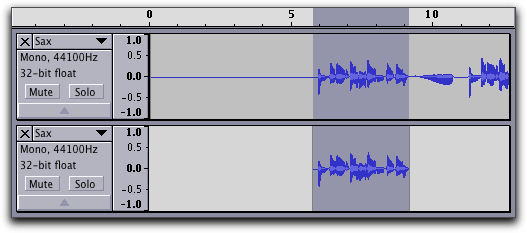
Creates a new track containing a duplicate copy of the current selection (see before and after figures below).
Paste - into an existing clip
When you select Paste and the cursor is inside a clip, the audio gets inserted into the middle of the clip and the following audio is shifted to the right to make room (see before and after figures below).
Paste - into the empty part of a track
When you Paste to a cursor position that is not within a clip, the audio on the clipboard is inserted and any following clips are moved over to the right (see before and after figures below).
Paste - into a selected region
Pasting into a selected region will replace the selection with the audio on the clipboard. Audio clips to the right of the selection will be moved if the pasted audio is a different size than the selection. (see before and after figures below).
Join
If you select a region that overlaps one or more clips, they are all joined into one large clip. Regions in-between clips are treated as silence (see before and after figures below).


